Best selling wood projects - An Elegant Jelly Cabinet Construction Part 7 Bringing Things Together

Best selling wood projects
Cleaning Up Dovetails with a Plane
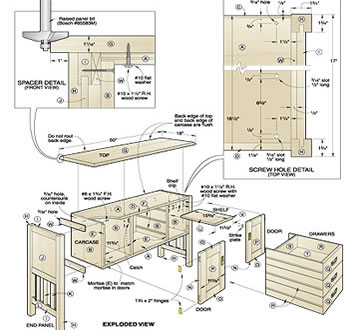
The carcass is glued, and once dry needs the dovetails cleaned up. They were a little proud, remember.
Low angle block plane to the rescue. Thank you Stanley 65!

Here I have flush planed the tails, but you can see that the pins still need attention. Mouldings will hide these on the finished cabinet, but what an excellent joint they make.
I dont have a low work table in my shed, so I have had to improvise. One side of the carcass is held in my bench vice and the other side is supported on a roller stand. This gives me access from above and below.

Time to slide in the shelves. I left the cutting of these to length until this stage so that I could fine tune them for a snug fit. I also used my block plane to chamfer the two front edges of the shelves before they went in. Much easier now than later.
I had a little problem with staining of the New Guinea Rosewood when I cleaned up the excess glue with a damp cloth earlier. It will plane or sand off in visible areas.

Time for a trial fit-up of the back panel. It is a little over size, and will be cut to length later.
This slides inside two stiles which will be attached to the sides.

You will notice that I have left a small gap on each side of the panel and inside the stiles. This is to allow for seasonal movement of the panel which will be fixed towards the centre, leaving the timber free to move.
Turning the Feet
While waiting for the glued stiles to dry, I decided to make up the four feet from the laminated scraps that have been glued and are now dry.

Into the lathe and round them down to a cylinder. My lathe is a classic and original Teknatool Nova 1000. This must be almost an antique by now.

The cylinder will be the same diameter as the widest part of the finished foot.

I start by marking out where each of the significant details are - top and bottom of foot, and bottom of the beady thing that terminates the top curve. I then use the parting tool to mark both ends, and at the bottom this becomes the width of the finished base of the foot. This gives me a width to work down to. Im no woodturner so I hope this makes sense.
OK - need to repeat this process until I have four feet that look close enough to each other to pass muster. You can see that mine are related but are definitely fraternal quads and not identical.
Like I said, I am not much of a wood turner, and I could be at this all week and not get four identical feet.
Whats that old saying - Perfection is the enemy of good enough!
If you are a perfectionist - then do not look at the next picture, and if you just cant help yourself and caught a glimpse by accident, then take two asprin and a cup of tea and have good lie down.

OK - nuff for now.
Door frame and door to come.
Happy woodworking to all ...........
Best selling wood projects
Best selling wood projects - An Elegant Jelly Cabinet Construction Part
7 Bringing Things Together
 Reviewed by teres
on
04.51
Rating:
 Reviewed by teres
on
04.51
Rating:
Tidak ada komentar: